We’ve been in business for 10 years this year and over the course of that time, my business has evolved and I’ve learned an incredible amount. So my plan for the year is to share what I’ve learned over the last 10 years with you.
 I’m starting with the topic of printed photos. It’s the most visible of our photo organization dilemmas. They take up the most physical space, and they tend to carry the most burden. No matter which side of the New Years Resolution/Not Resolution mindset you fall on, I’d bet there’s a good number of you have had “getting my photos organized” on the list. We’ve been teasing you about PixLab and how we plan to help those who want a more hands-on experience to organizing their photos. But in the meantime, here are my 10 tips for getting started on the process.
1. Begin with the end in mind. Are you preparing your collection to pass down? To reduce the footprint of the collection? To create a coffee table photo book for your family? Knowing what you want to accomplish helps you determine what to keep, what to scan, and what to toss.
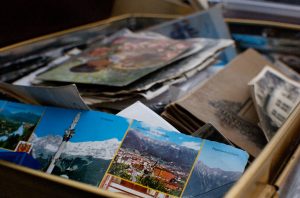
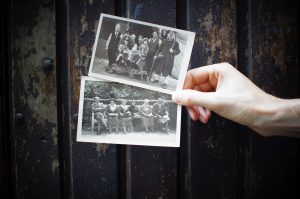
2. Gather all your prints and associated memorabilia in one place. Don’t spend too much time worrying about duplicates and photos you don’t want to keep. This step is just an opportunity to get an overall view of your entire collection. This might include gathering photos from other family members that you want to include in your collection. If your family members have a tight grip on those “only copy” photos, invite them to be part of the process. If your plan is to digitize, offering family copies will go a long way.
3. Communicate your intent. This will invite buy in from reluctant family members as well as add personal accountability to finally getting started and actually finishing. You might even receive some photos you’ve never seen before if your family knows you’re serious about finishing and sharing the end result.
4. Prepare your space. Having a dedicated space to work and not be distracted by other home chores is key to being productive. Set a timer if that helps. Determine what kind of space you need. If it’s your dining room table, will that motivate you to keep working because you need your dining table? If it’s the basement or other out-of-sight space, will it just be the new place for your photos to go to die? Having a bright happy space where you can spread out is a lot more inspiring than a cold dark room no one ever sees. There are ways to work and clean up after each session so that your dining table can still be a dining table. Those are the tips we’ll learn during PixLab.
5. Prepare your tools. Gather the supplies that you’ll need to complete the project. You’ll need things like Index cards for temporary dividers, sticky notes for temporary notes, photo-safe pencil, archival photo box, nitrile or cotton gloves if you like.
6. Separate your photos from other paper and memorabilia items. You can sort and organize all of it but it’s easier to compartmentalize by splitting them into different pieces of the overall project. One bite at a time.
7. Determine your preferred sorting method. Think about how your brain works. Do you find things by date or event or a combination of both? Use your index cards and sticky notes to write the date or event. Sort your photos into those sections. If there is information on the photo envelopes, make sure you capture the information in some fashion before tossing the envelopes. Tossing the envelopes will help save space. They are generally not archival, but they often reveal valuable information you’ll want to keep. So just keep an eye out for that. For now, keep the negatives together with the prints. We’ll deal with those later.
8. Remove the envelopes, duplicates, poor exposure, blurry photos. This is where you will really start to see the reduction and it feels so good! Check with your local waste management to see what is recyclable. For our community, we can recycle photos we’ve printed at home but not photos from a professional lab.
 9. Make some time to meet with family or friends that might be able to provide some clues to the heritage photos where you can’t identify the person or the story. This is where real connections start to happen and that’s what these photos are all about right?
10. Make a final pass and pull any other photos that you find to be redundant or unimportant. Now is also a good time to pull the photos that you would like to digitize. I don’t recommend digitizing everything unless you really want to. I also don’t recommend tossing all your originals once you’ve digitized them. Those prints have likely already stood the test of time and are a good form of backup. Unless, of course, you’re dealing with mold or other toxic issues.
11. Digitize your favorites. Ok so that’s 11 tips, arrest me. Scanning your favorite photos opens the door to all kinds of projects like photo books, home decor, and videos.
So are you ready to get started? Let’s launch this project from burden to legacy!

Recent Comments